Website powered by

Finally, you to can have your own surface scanner.

General / 24 February 2020

Well....

It seems like it took forever, but it's finally done. After saying I was going to release my scanner to the world I've finally have. https://www.artstation.com/daverig/store/2k3w/scanning-reality-box-srb-1-blueprints 


I have re-branded it the Scanning Reality Box or SRB-1, ScanBox just didn't seem catchy enough :)

If you have been following the progress of the build and were interested in having a scanner of your own, now's your chance. The original plan was to sell complete kits but I didn't think I could or want to produce them, would have been too much effort without creating a proper production pipeline.

Also I know a lot of people have built there own after my original posts of building the 1st scanner. I expect this to continue, but the kit is a good option for people that don't want to go though the effort of figuring out the details for their build. 

Not sure what is next for me. Producing the scanner introduced me to 3D printing/manufacturing world which has really pulled me in. So much so that I now also have a CNC machine , which actually would make producing the scanner easier :)


I plan to make a tutorial video of my workflow Start-to-Finish for scanning something so people have a idea of how I uses it. Other than that if anyone has any requests on info for the scanner let me know in the comments below.


The wait is over.... ScanBox V2 has arrived...

General / 27 June 2019

After a long wait, it’s finally here... Completely redesigned from the ground up

Scan Box v2


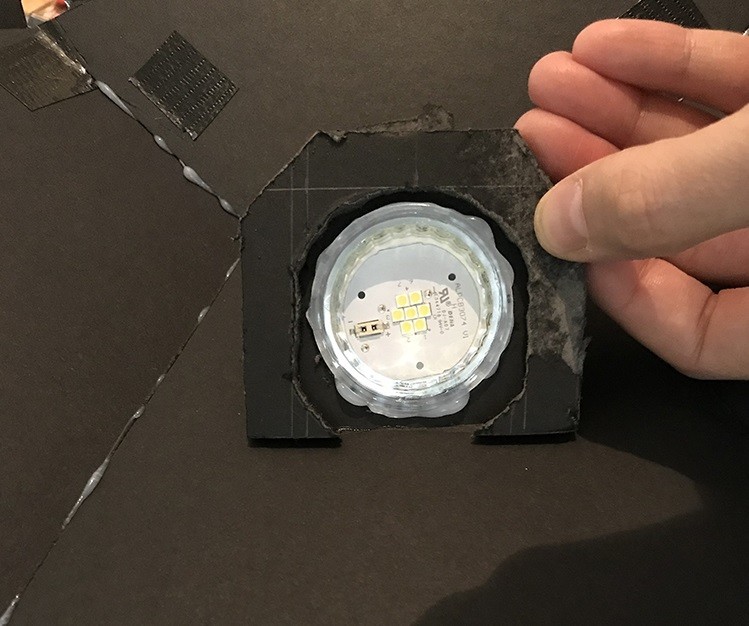
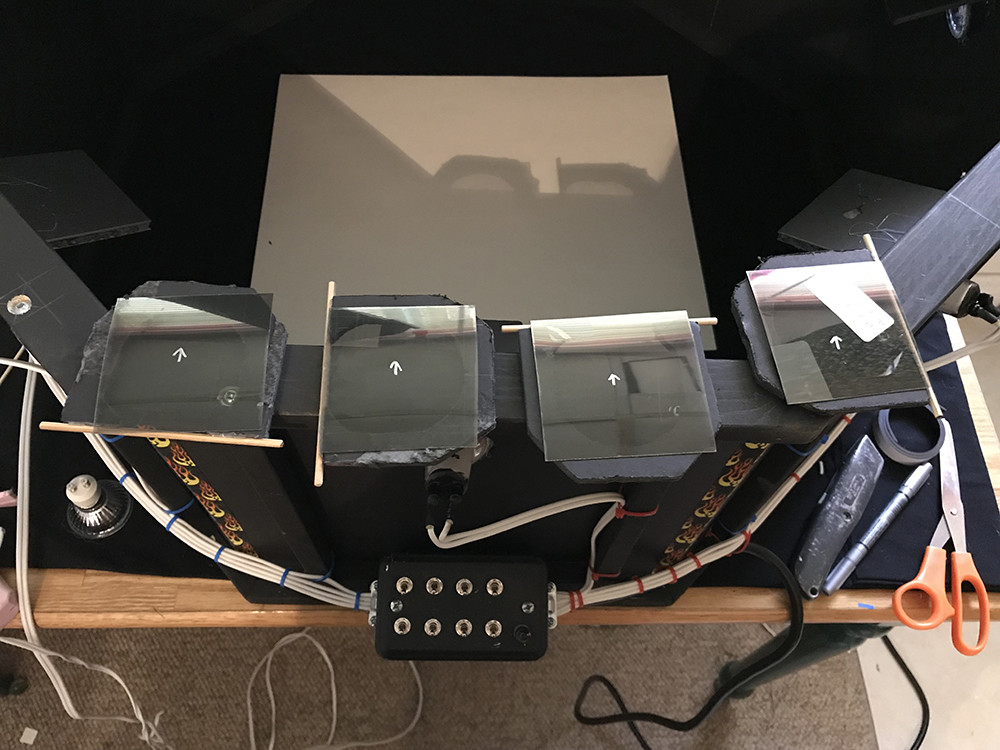
I've done away with hot glue and MIG welding and incorporating advanced 3D printing technologies in the manufacturing process, there’s still a little bit of tape though.


Scan box v2 also now run on a 12v power supply instead of 120v which greatly lowers the risk of people curling their hair by touching the wrong wires.


As easy to assemble as any item from your favorite Swedish furniture company you only need a screw driver to put everything together, and maybe a little soldering.


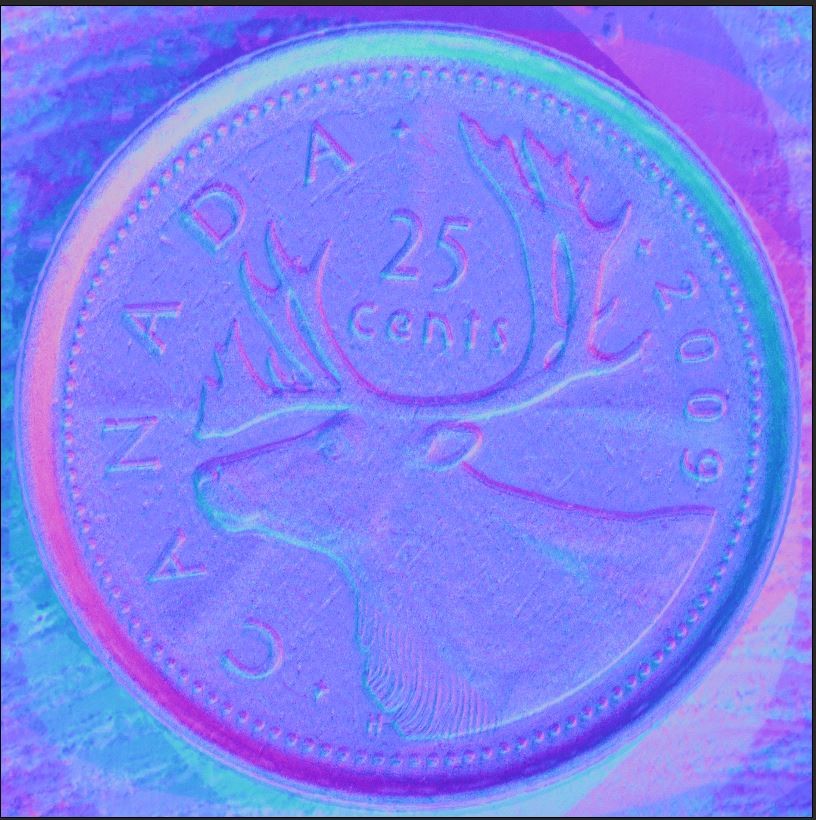
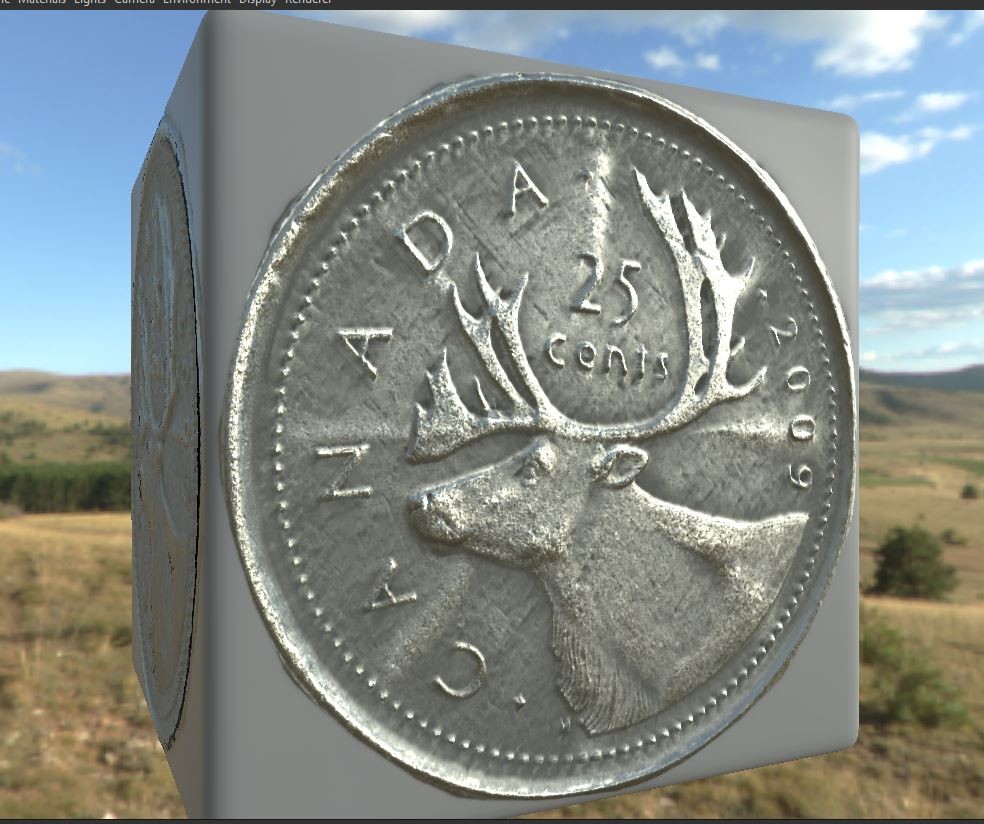
Paired with substance designer, capture almost any surface and accurately digitally re-create it in the digital word with normal maps so sharp they'll cut your eye balls (not responsible for eye injuries from looking directly at the normal maps)... :)


Ok, Sales pitch over... Wow am I happy to have finally finished this, well almost finished. I still have to add the polarizing filters but that's more of a add on. I'm still using wood beam and foam core board to keep it light and the cost down. I'm already thinking of V3 and using Extruded Aluminum. That will make it much sturdier but much heavier and cost more. With it running on 12V DC now you could also run it off battery power and be mobile.

 This took a lot longer then I thought for 2 reasons. 

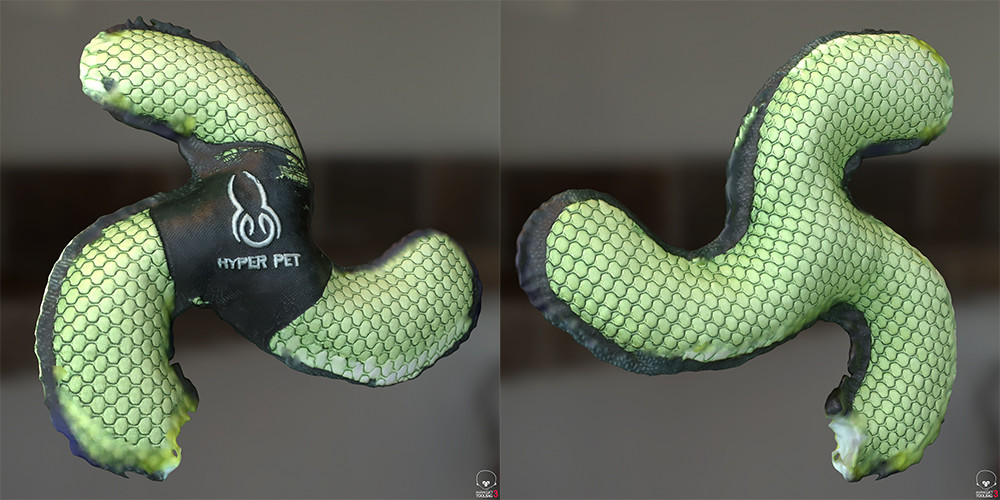
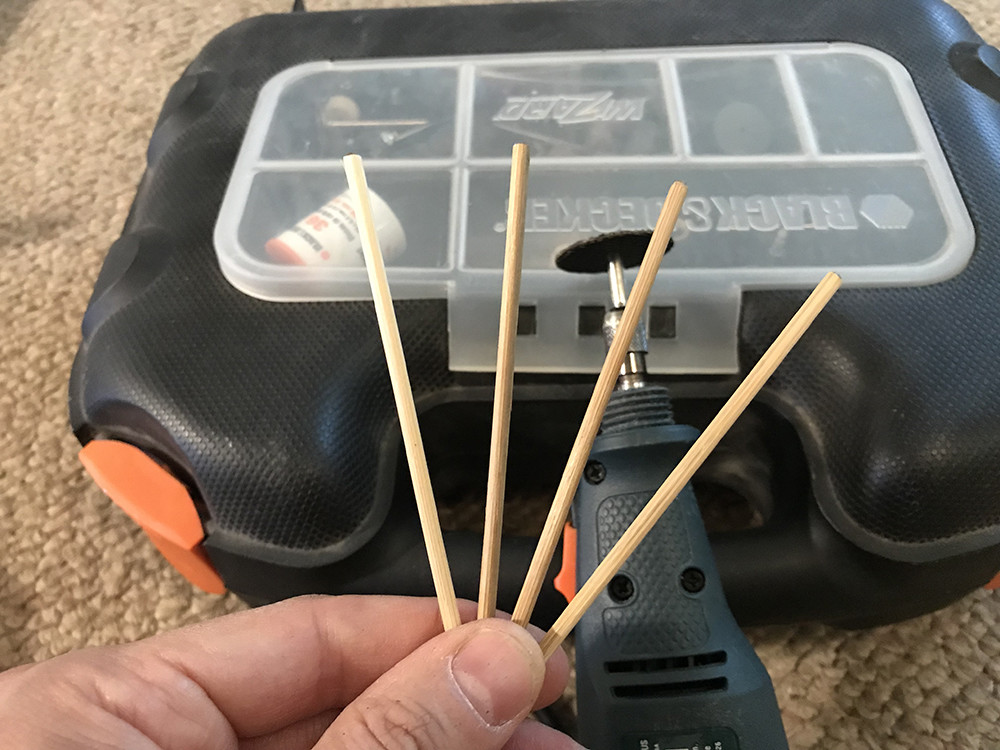
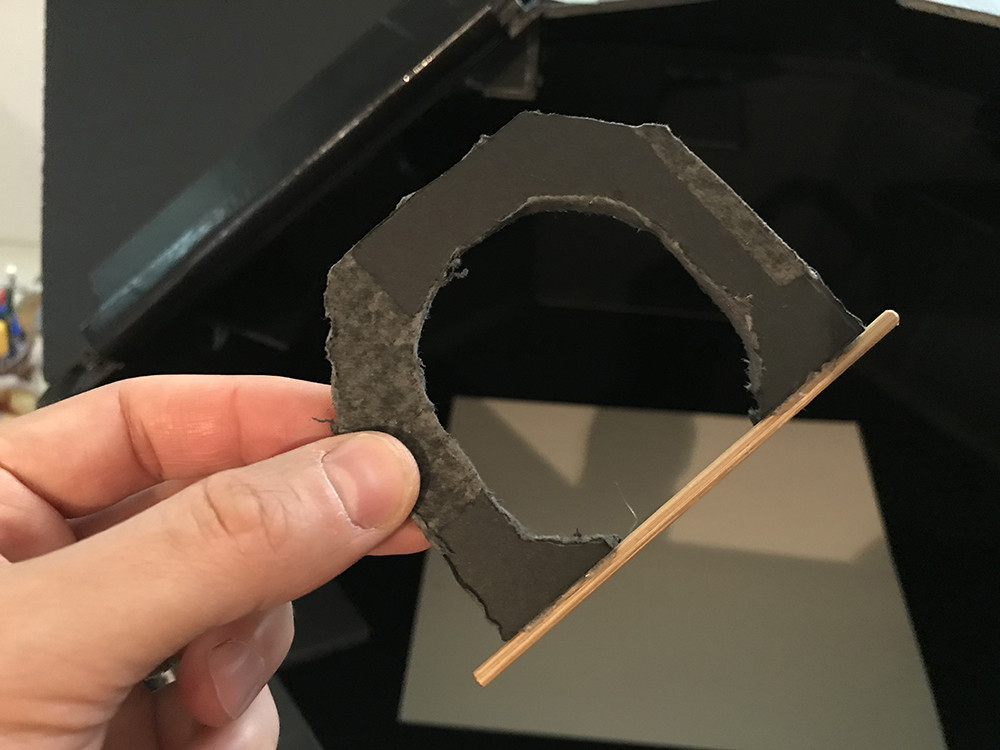
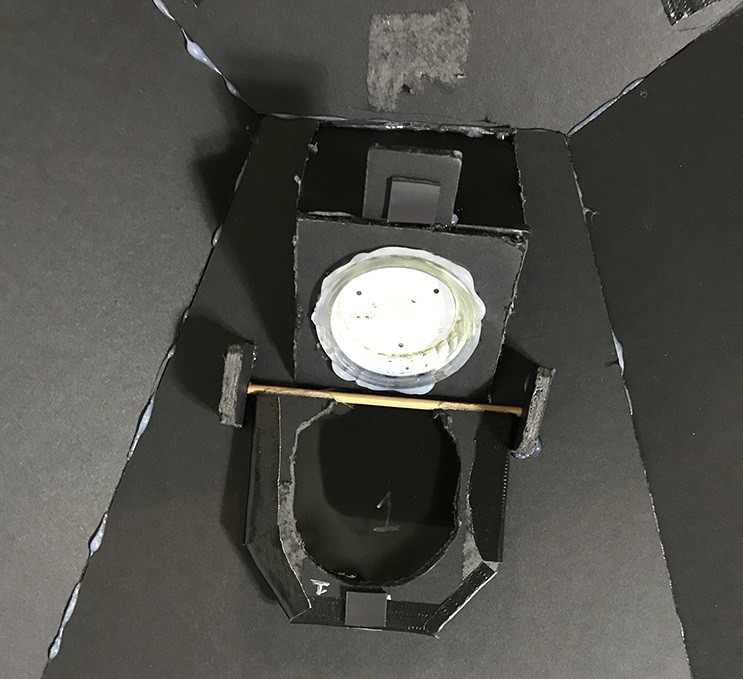
First designing and printing structural parts to be 3D printed was challenging.  I could have made the faster and easier by hand but the point of printing is now I can make more with the press of a button. 

Second I had no idea how much I would like designing and printing things which took a lot of time away from the build. For example this, (I downloaded this model though, didn't design it myself):


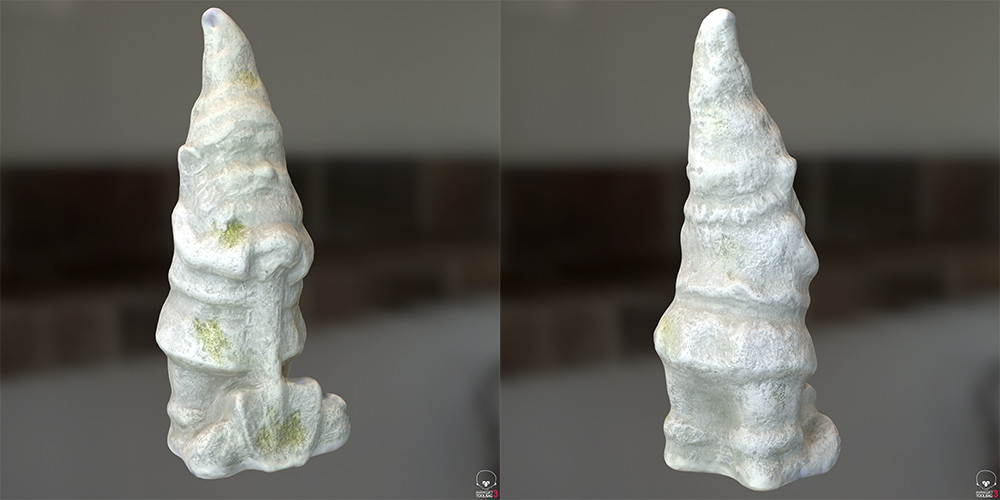
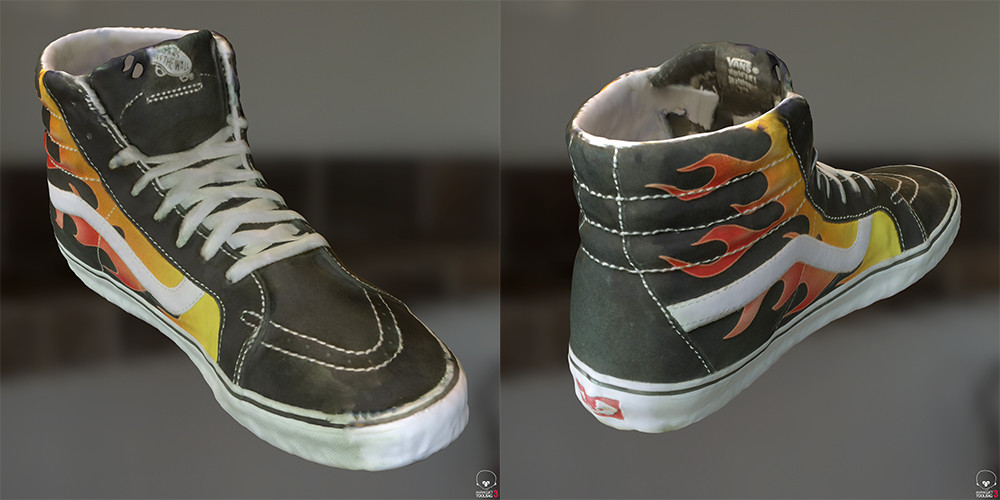
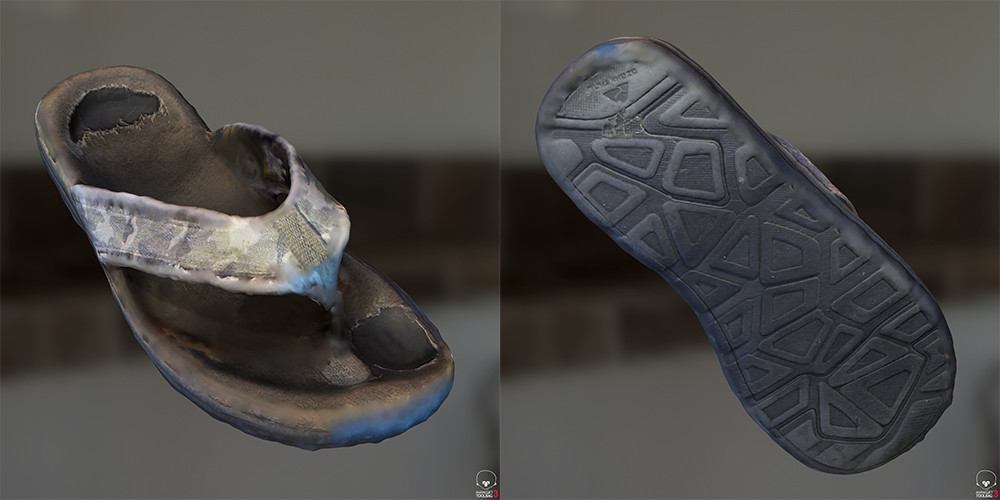
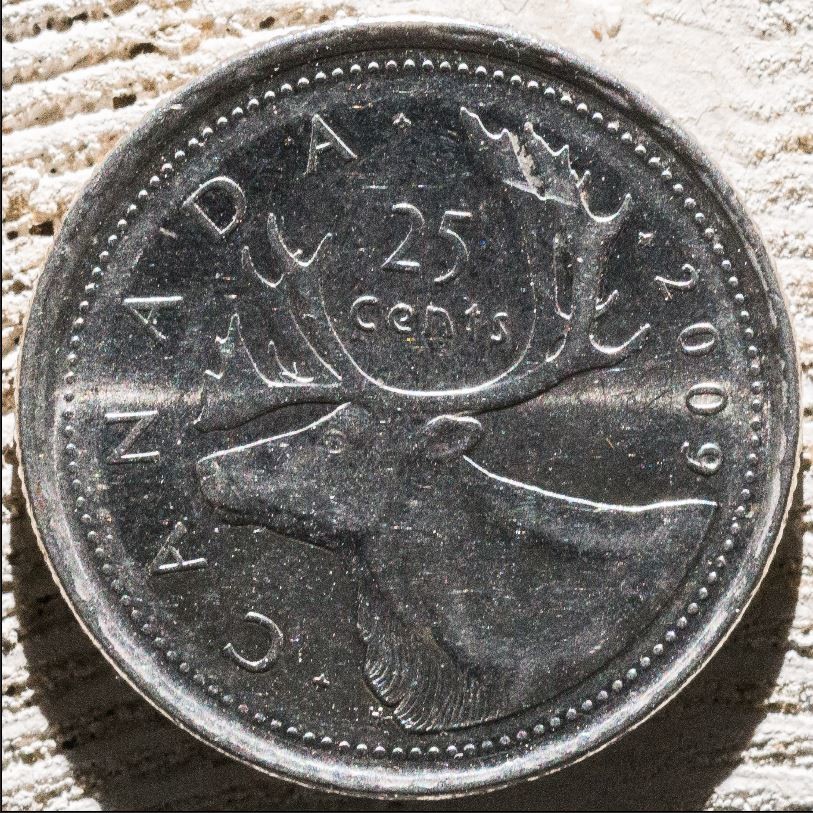
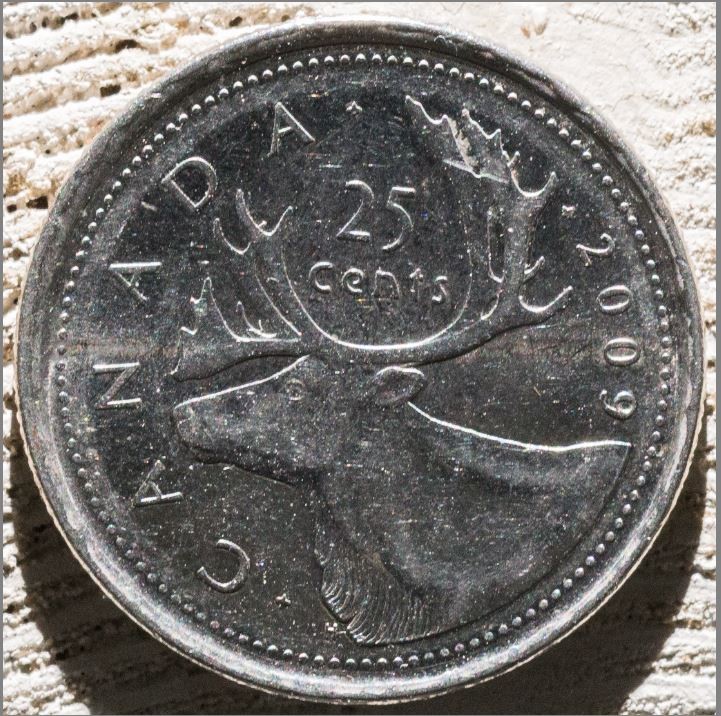
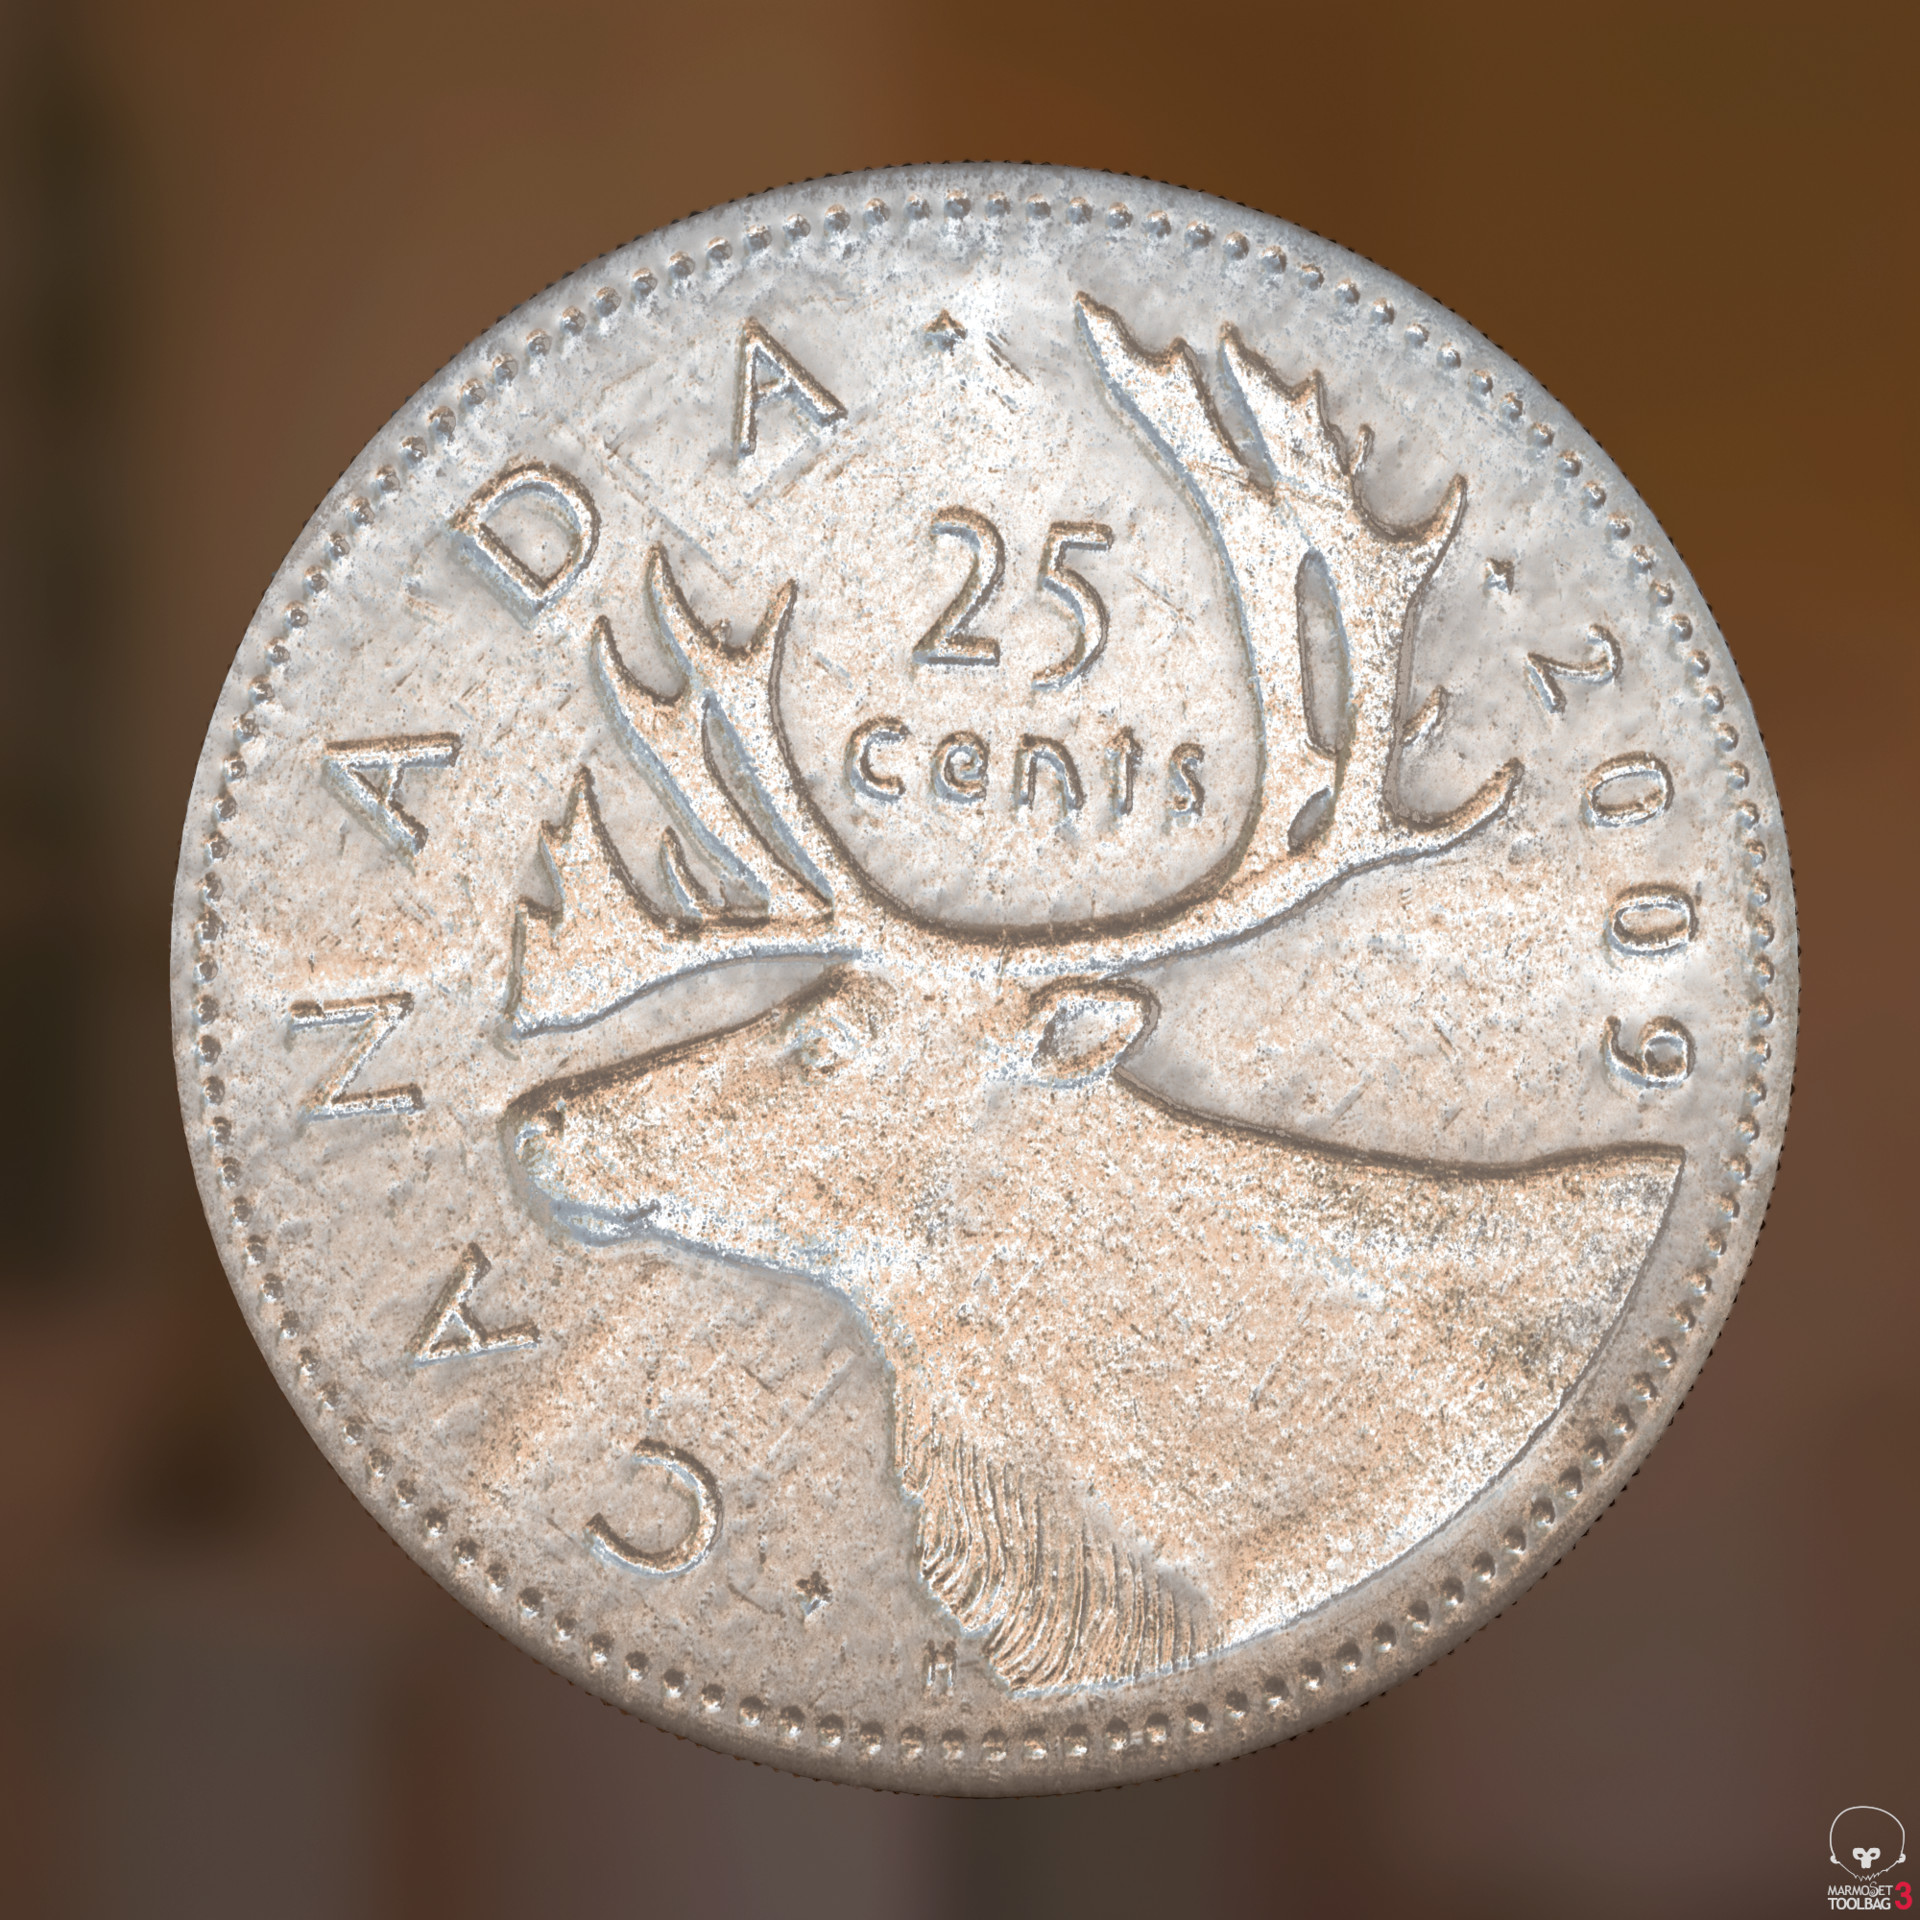
Functionally it's pretty much the same as the original scan box. I've only done a few test so far and I haven't taken the lenses off the lights yet so I'll need to do that still and compare the results. Here's a couple of the test.

So I found this bark on a hike a few months ago. A huge piece has just pulled off the tree. I had to cut the ends off for it to fit in the box.

Really liking the new rendering options in Designer. :)

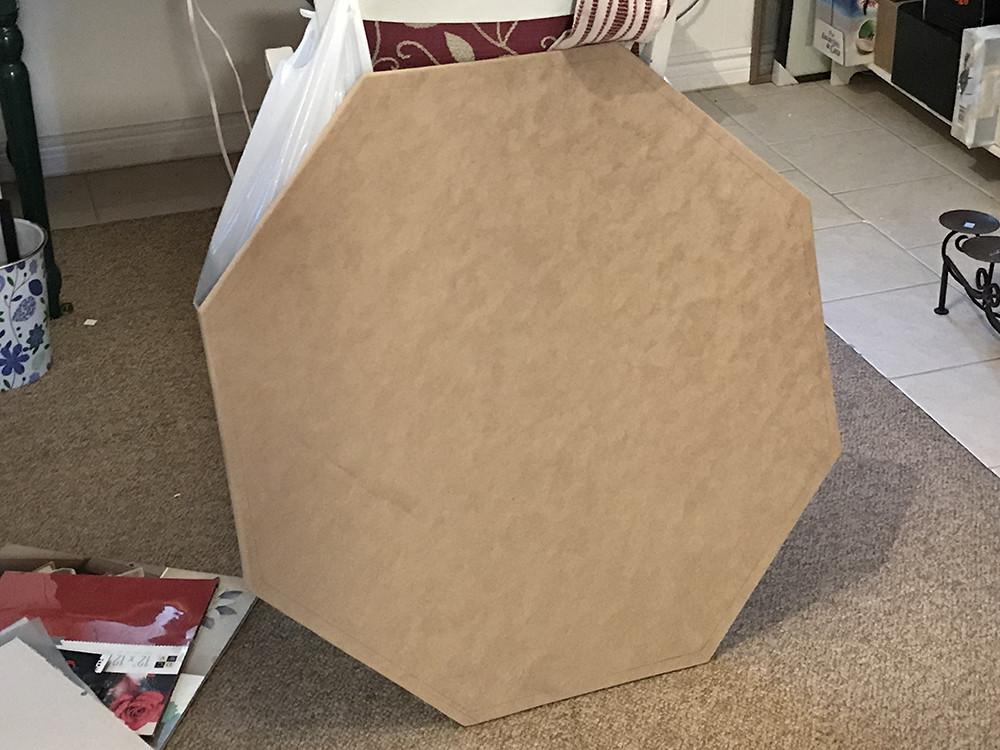
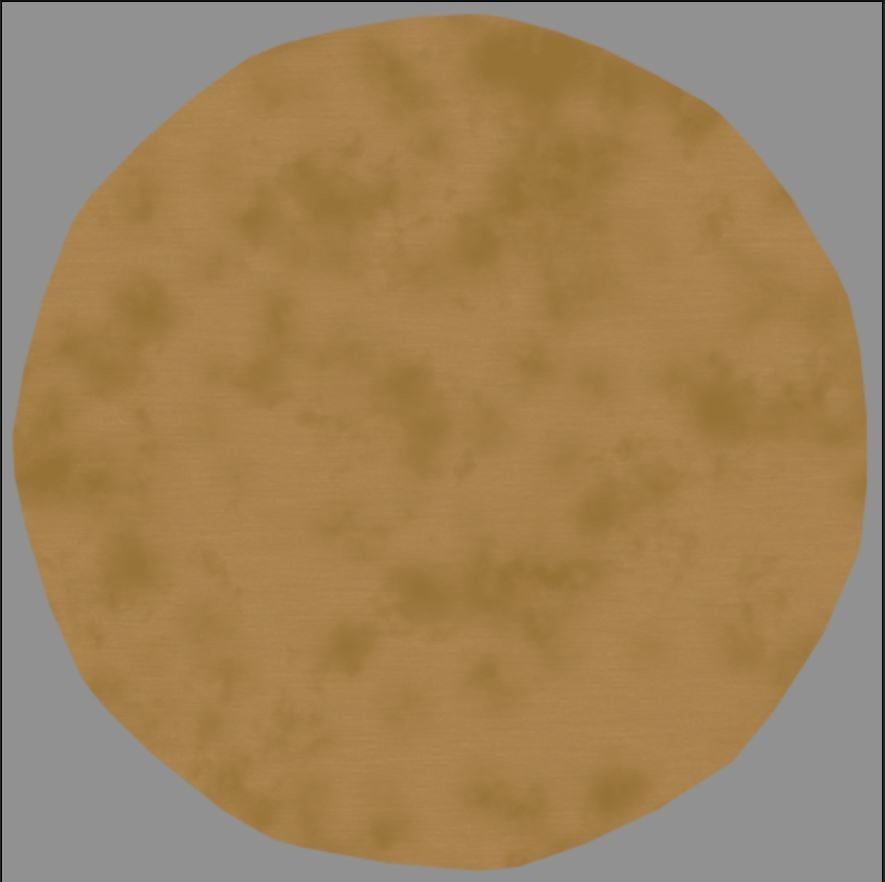
I tried a few fabrics also. I could someone getting rid of a bunch of fabric samples, and I still need to sort them but I just grabbed a few to test with. 


I ended up cropping down to a small area so it tiled nicely. In the future for patterns like this I may just photograph a very small area like this to start.


And a few similar ones.

I didn't notice the little black spec in the top right, I'll need to clone that out. this fabric so I ended up with this odd crop after adjusting the auto tile node but is still seemed to work.


  Looks interesting on the material ball :)

These other 2 scans were of fabrics with no really design, just a weave pattern so I put them on some other meshes. These are tiling 2-4 time I think.


Keep watching as I'm going to start posting more scans as I go though the big box of fabric I found. 

Since my posts on the original scanbox many people have reached out to ask for tip as they try to build their own scanbox. I'm always willing to lend some advice so don't be afraid to ask. Also if you are looking for something of a more professional interaction I can also help consult on your scanning needs so just have your people call my people. :)

I had thought about selling the scan box once it was finished so now I just have to figure out how I want to do that. I also need to see if there is a interest so let me know in the comments. Or maybe Allegorithmic / Adobe want to do a collab???

Anyway till later and thanks for reading.

Open for Business...

General / 02 March 2019

I've been away from doing anything with scanning for a while but am finally getting back around to finish what I started.

One thing I have been putting off is making my material scans available on the store here, but I finally got that finished today. https://www.artstation.com/daverig/store

All the files have 4K maps, the designer SBS file and the source scan images and have a commercial licence. So you can use them as they are or open the graph and play with the scans to adjusts them to your liking.

If there are any questions let me know in the comments and if there is something you would like that I didn't post let me know and I'll get it up there. That goes for requests too, if there is a material you would like to see scanned let me know and if I can get my hands on it I'll scan it.

Also there should be some updates on the scanner 2.0 build in the near future so stay tuned.


HP Z 3D Scanner Testing

General / 13 July 2018

A little while ago I was contacted by HP to see if I was interested in being part of their beta testing group for the new HP Z 3D scanner. The Scanner sits on top of your monitor similar to a webcam but faces down to your desk below which becomes your capture area. Check out the their video to see how it works https://www.youtube.com/watch?v=oBO-0LC1nNM

The setup is pretty painless, just plug it in like a webcam and install the software to get up and running. Being experienced with traditional photogrammetry workflows and my recent surface scanning projects i was interested in seeing how this would work, and it worked pretty much as advertised. The meshes below took about 5-10 min each to scan start to finish, way faster then shooting a series of images and then processing.

What you gain in speed you lose some in resolution which is understandable. The meshes aren't as detailed as something as I would generate out of Photoscan but the software has Allegorithmic's B2M integrated to generate normal and roughness maps. For the texturing it has a 14mp camera where it will capture images of the object and map them automatically. 

I have to play with it more but overall I'd say it works pretty good. Some objects work better than other and concave meshes seem to work best, this is the same for photogrammetry in general. I was surprised how well it handled thin objects with undercuts (See Sandal below) for constructing the mesh, sometimes though it has a hard time with the texturing of the thin edges. But if you take these meshes as just a starting points to edit your mesh your off to a pretty good start. 

All the meshes below are the raw scans and maps rendered in Marmoset. I've included a Marmoset viewer for each so you can see the mesh, maps, and look around the objects. 

The football worked really well, almost perfect. 

The dog toy also worked really well considering how thin it is. Some of the textures on the thin edges has some issues though.

The Gnome also came out practically perfect. I use this statue as a control test in most of my work. You can see what it looks like when processing in photoscan https://www.artstation.com/artwork/lXNXk Pretty similar except in PS I was also baked AO maps from the model.

The shoe also did pretty good and handled the thin edges well. The texturing had a hard time in a few spots but not bad overall.

I was surprised how well the Sandal mesh generated as it picked up the full strap above and below. The texturing had some issues though, could have been something I did, but the bottom texture came out pretty good.

That's it for now, I'll update with new scans as they come. 

Also I'd like to thank HP for reaching out to me to see if I wanted to play with their new toy :)

Installing Polarizers

General / 09 July 2018

Today I got around to installing the polarizing film on the new lights in the scanner. It’s a slightly modified version of the idea I had earlier where the filters would flip foraward and back over he light.

After I cut out the four blanks I needed to cut out the centers. For this I’m using a Dremel with a rasp bit so I can carve out the curved design.

Here the final shape that will be covered by the film.

Just test fitting to make sure the panel will clear the light. The film will be on the outside of the panel so the light will slightly recess into the panel when engaged.

Next is the axles that the panels will rotate around. These are just Shish kebab sticks that I cut down with the dremel and glued to the panels.

The sticks are slightly longer then the panel so the ends can be attached to the scanner and with the sticks glued on they add structural support to the bottom of the panel.

Next was attaching the polarizing film. I had to mark the films direction so I could make sure they were all facing the right way during the installation.

Here’s what a finished panel looks like. The film is just taped onto the panel and you can see the flat magnet at the end of the panel. I’m using the magnets to hold the panels in there open/closed stated.

And this is a completed light. The 2 foam core pieces on the ends of the panel have slots cut into them for the axel to sit in allowing them to freely rotate in. Also a small platform was added at the end of the light to hold the magnet that keeps the panel engaged, there is also a magnet on the outer wall the holds the panel open.

Here’s the other lights showing the panels in the open and closed states.

Same as above image but with the lights on.

So that’s all for the lights, they are all ready to start scanning shinny things. 

This weekend I was working on some other construction projects around my house so I decided to cut out a base for the scanner while I had the tools out. This will eventually house the underlighting for capturing transparency and some kind of device to stretch fabrics flat.

That’s it for this update. I’ll try to post some new test scans this week and stay tuned for updates on the base integration.

Thanks for reading.


Question for a Friday afternoon...

General / 06 July 2018

I have a question for anyone that has been following my scanning work. You may notice that I have a "Store" button on my page now, I was able to get into the Beta. 

So the question I have would there be any interest if me putting a tutorial on how to build a surface scanner like mine? 

  • Maybe just detailed plans with material lists? 
  • Or a construction walk through video? 
  • Or maybe physical built to order scanners?

I'll probably add some of the scan materials I've already done but I'm trying to gauge interest in scanner construction material. 

If you have any thoughts let me know in the comments below.

Thanks. 

PS, I'll probably be adding some feature to the scanner this weekend so stay tuned for updates.

Making Money

General / 30 April 2018

 Trying something new I tried combining some macro photography with surface scanning. For this I used my old Nikon 105mm macro lens.

Here's what the image of the loonie or dollar coin looked like

I started using the images for the diffuse but notices it really wasn't adding much because so much detail was coming from the normal maps. Here's what the diffuse and normal for the Loonie ended up looking like

For the Diffuse I used the titanium substance material I got off substance source and added a grunge map of a different colour to break up the colour a bit. I also added a circular mask to mask out the background. Here's what the graph looks like

Here's what this ended up looking like in substance

and in Marmoset


Follow the link to see more renders and some video turntables in my portfolio

https://www.artstation.com/artwork/5kXgE

The quarter was pretty much the same process except I changed the metal node to a silver one, also there a few issues.

Because the silver quarter was still extremely shiny there the lights cast a hotspot line parallel to the light. I thought of trying to add something to dull the finish but because of the magnification anything I added would show up in the normal map.

Here's what the hot spots looked like and what they were doing to the normal map. You can see in the normal 2-3 bumps running across the coin.


Then I had the idea of just paining out the hot spots in lightroom because I wasn't using the image anyway. I ended up using adjustment brushes to painting some  negative hightlights and exposure on the 8 images.

Here's the mask and the end result


and this was the final results 

Here's what the diffuse and normal ended up being

and rendered in Marmo

Follow the link to see more renders and some video turntables in my portfolio

https://www.artstation.com/artwork/5kXgE

I have a few other coins to try and a few silver dollars, they are very old though so they have lost there shine which should help the process.

What I like about this is the look of the coin is totally adjustable since no image is used. 

That's it for now. Thanks for reading.

Carpet Mashup

General / 16 April 2018

On the stairs in my house we recently added these carpet treads as one of our dogs was having issue with the stairs. Looking at the pattern on the ends, I though this would be a good experiment to see if I could scan a piece of one of these treads and create a carpet from it. 

If you want to see some renders from Marmoset follow the link to my portfolio https://www.artstation.com/artwork/b1zbE 

To start things off, here's the portion of carpet that was scanned and the crop area in Lightroom.


Here's a overview of the whole graph. now that it's done I could probably go back and optimize if by moving some of the switching I'm doing up stream. 

The graph started as all my others do. Nine images, one Diffuse, eight light angles images. After the normal was generated a Smart tile node was used to adjust the scan and trim off a bit of the right edge.

Here's what the output of the tile node looked like. You can see the red square which is the edge of the texture and how it tiles.

Next was turning this piece of carpet into a full rug. To do that I used the Tile Generator node. The generator was set to a 3x3 grid with 3 inputs. The left and right sides of the rug was simple, the left input was connected directly and the right filters the same input though a transform not to rotate is 180 degrees. To create the center field of the carpet I mirrored the section that didn't have the edge pattern and used some clone patch nodes to remove symbols in the original texture. The nodes were then copied for the normal, I supposed I could have used the multi clone patch nodes... For the height map 3 textures were created off the the 3 normal map nodes.


After all the combining this is what I end up with for a Diffuse. 


 From the combined maps the rest of the channels were generated. The center looked a little too plain so I decided to clone the small brown symbol in to the center. Also I layered on a grunge map into the normal channel to add some wear marks onto the carpet.

And after all that we end up with this. You can see the bumps running the length of the carpet coming from the grunge map. It adds a little something to the material and hides some of the tiling issues :)

After I finished I started experimenting with different patters and ended up with 3 that I liked. To manages it all I ran all the final outputs into 2 switch nodes for each channel, then into a basic material and then into the outputs so I could easily switch between version to render the outputs. In the future I could wire all this switch nodes to a common function to switch them all from 1 parameter.

For the 2nd carpet version I took the original output textures and mirrored them to create a interesting pattern, this was then fed into a similar tile generator and reused the previous textures for the center of the carpet.

This is what the  mirrored edge patterned looked like

And this is the final version of the second carpet. Still using the same grunge map to add some life to the surface.

For the 3rd version I used the edge patterns from version 2 and center carpet from version 1 but mirrored the original texture again with different settings to create a smaller strip that I used as a center stripe in the carpet.

Here's what the center stripe looked like.

And here the final third version.

I think these all turned out pretty good, some better than others. Now that it's done I think I could go back and simplify the setup so they all feed into 1 tile node and just switch the inputs.

That's it for now, Not sure what will be next but I think I'm done with carpets for a while. If you have any suggestions or ideas leave them in the comments. 

Thanks for reading.

Building a Rug

General / 02 April 2018

I have this throw rug in my laundry room that has a somewhat interesting pattern and a very deep cut embossing so I figured it would make for a interesting scan. The issue I predicted though was tiling as it already looked like the pattern wouldn't fit nicely into a square. After getting the pictures into lightroom and cropping it seemed I was right.

Here's that the starting diffuse ended up looking like in Substance after going though the colour equalizer node to get rid of any hot spots.

I tried a few different way or rotating and tilling this to see what I could do with the patter and ended up on this. I used a mirror node horizontally  (top one) to flip it on it's self to make 1 section of the patter and then used a transform node to rotate it 180 degrees (Bottom). I also mirrored the image vertically before the rotation to ensure it would tile nicely. 

Here's what the images looked like when mirrored horizontally. 

Then the 3 maps were fed into a tile sampler to create the final pattern with the one pattern running down the side and the two other maps placed facing each other to create the center pattern.

Here's what the full graph looks like. For the Normal I duplicated the nodes used for the diffuse. I tried generating the height from the new constructed normal but it was having issues and found I got a better result but creating the height from the starting normal and duplicating the nodes to construct the full texture.

Here's what the normal and Height ended up looking like.

This rug turned out not bad. I wasn't really sure if it was going to work when I started and my initial plans didn't work out. Sometime if you just keep turning and switching the puzzle pieces around eventually you end up with something that fits.

Follow the link to my portfolio so see some Marmoset renders https://www.artstation.com/artwork/byeOm


Under the rug

General / 29 March 2018

In one of my previous posts someone had commented they wondered if this technique would work on a carpet so I gave it a shot.

Here's the throw rug that I scanned

Since the pattern repeats I placed the large circle in the enter and planned the cut the 4 smaller in quarters so they could tile. I was able to scan a area a little bit bigger and do the fine tune cropping later in substance.

Here's the scan with the initial crop area

The graph for this is similar the the ones I've been using so far. Difference in this one is the diffuse and normal go into a muti crop node before continuing though the graph

This is what the diffuse and normal look like after the crop node

In the normal you can see a slight ridge running vertically through the center of the image. It seems there was a slight bump in the carpet that I couldn't see. I guess one of the risks of the high detail this scanning can capture is it can pick up imperfections you can't see normally.

Here's a look in Substance

and a render in Marmo on a plane tiled 4 times

Check out a few more Marmo renders in my Portfolio https://www.artstation.com/artwork/P3VVB

Boy that line is annoying... Anyone have any suggestion on how a issue like this in a normal could be fixed? 

Also if anyone would like to see something specific scanned let me know in the comments. 

Till next time.