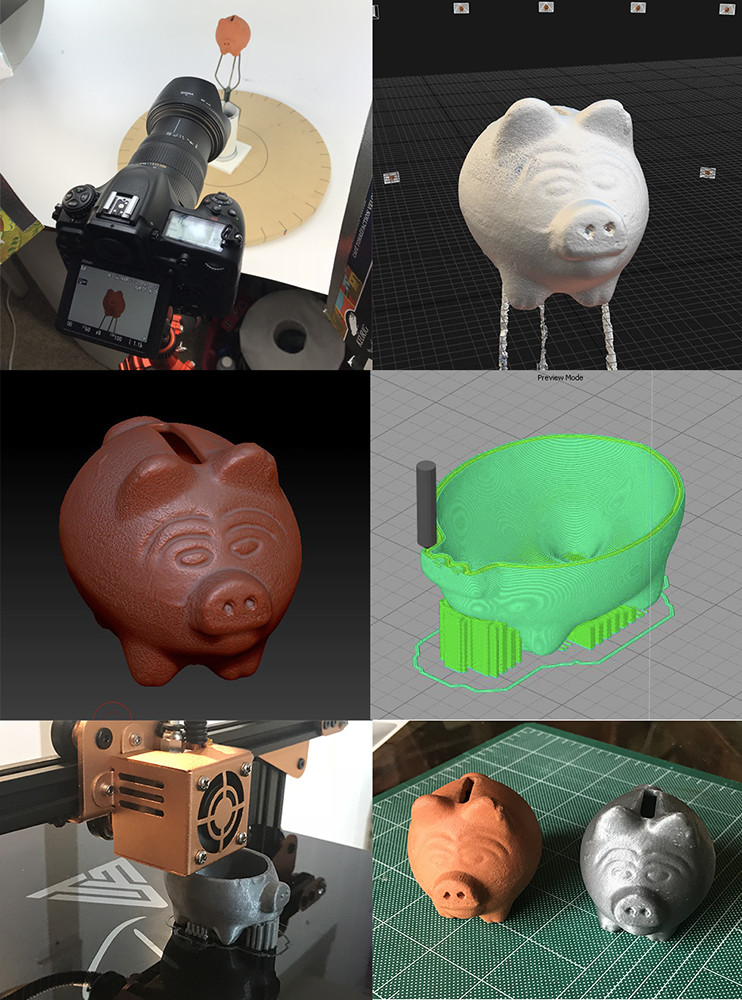
After getting the initial tests and calibration prints out of the way it was time to try replicating something by scanning it and the printing.
The subject was a small clay piggy bank. Pictures below show the steps which were:
- Shoot images on my turn table, about 100 images or so.
- Construct mesh in RC.
- Clean up mesh in Zbrush, then in MeshMixer create the hollow volume inside the mesh, then back to Zbrush to Boolean out the coin hole
- generate the .gcode file for printing in Simplify3D
- Fire up the printer and wait.
- Last is side by side comparison.
Quite happy how this all went and only took about 5-6 hrs. 1-2 hrs shooting and processing, 1-2 hrs cleaning and prepping (mostly because I was learning Meshmixer and Booleans in Zbrush), and 2 hrs printing.